
 Share This Page
| Home | | Linux | | | Share This Page |
 Intel NUC
A new kind of computer
Most recent update:
Copyright © 2019, P. Lutus — Message Page —
(double-click any word to see its definition)
In a long computer science career I've owned a lot of computers. If we disregard programmable calculators, my first computer was an Apple II, which I promptly tore apart and reshaped to suit myself:

Figure 1: My first computer (1977) (click for full-size)
From Figure 1 readers may be able to guess that I dislike computers that try to merge everything in a single package, because one part may wear out, fail, or become obsolete before the rest. It also means the computer requires the human to accommodate its needs rather than the reverse.
Over decades of time I've owned many kinds of computers, most of which assembled a processor and peripherals into a convenient package — a "system unit" in IBM's marketing language. Then laptops came along, which increased the level of integration — display, keyboard, even a power supply.
For a casual computer user or one with limited space, or while traveling, a laptop makes sense — it's not practical to have a separate display and/or keyboard on an airplane. But in other environments, and for special purposes, more flexibility is desirable.
Modular Computing
In modular computing, hardware elements are assembled to meet a particular need, with the assumption that a given configuration is flexible and temporary — the opposite of a typical user's priorities. It's a scheme suitable for hardware and software developers who constantly reconfigure their systems, but it's not practical for people who just want to use a computer.
My typical configuration is a small computer somewhere on the spectrum between a Raspberry Pi and an Intel NUC, a wireless keyboard and mouse, a display with an HDMI connection, and a number of USB backup drives. Each of these elements can be replaced without taking down the system.
The bad news about modular computing is the many required cables and wires, and having to remember all the essential bits and pieces if the system must be moved. The good news is that it's much more resilient in the face of failures than a laptop or desktop machine that tries to integrate everything into a single package.
After owning some laptops and noticing how any failure rendered the entire system unusable, I started thinking about a more modular approach, which ironically was the norm before laptops became available.
I should clarify that my computer gear has special requirements. Because I travel a lot, by boat and RV, ideally a computer will run on a 12 volt source and not require very much power, so it can be run for a reasonable time without exhausting available battery power. My systems also must run navigation software, accept input from a GPS receiver and display nautical charts, which turned out to be a tough requirement for small systems.

Figure 2: Raspberry Pi
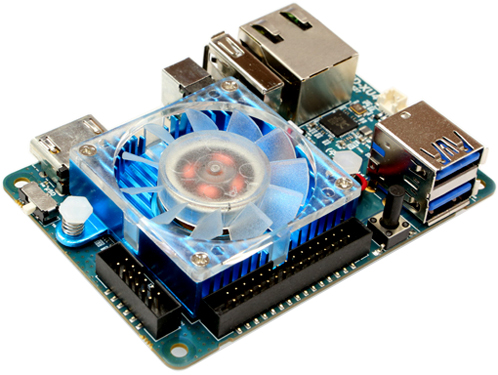
Figure 3: Odroid XU4
My first "little system" was a Raspberry Pi, which was fun to play with but not powerful enough for my needs. Then I acquired an Odroid XU4, supposedly a cut above a Raspberry Pi, but mine was a disaster — it never worked reliably, in spite of an epic struggle.
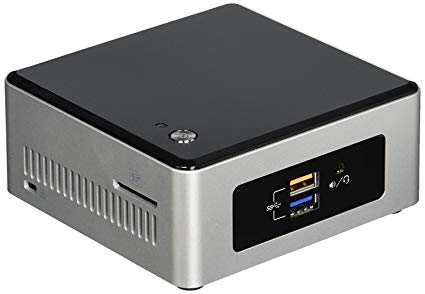
Figure 4: Intel NUC5CPYH
Then I acquired my first NUC (Intel says it means "Next Unit of Computing", maybe a bit pretentious), an Intel NUC5CPYH, an inexpensive Celeron 2-core system, which was almost fast enough to do what I needed. I should say that, if my purpose was to have a somewhat slow but adequate system that would run on a 12 volt source without quickly draining my batteries, this device would have been ideal.
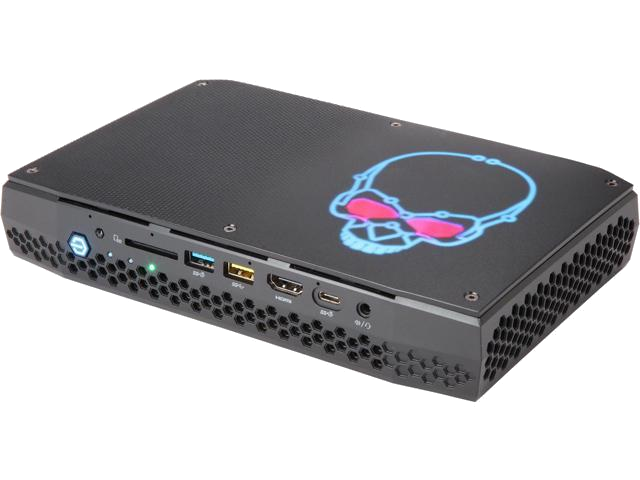
Figure 5: Intel NUC8I7HVK "Hades Canyon"
After some online research I decided to try an Intel NUC8I7HVK, which is a high-end system and somewhat larger than other NUCs in Intel's lineup. I was a bit worried that it would not meet my special 12 volt requirement — either I wouldn't be able to find a suitable 12 to 19 volt converter (most NUCs require 19 volts) or if I did, the system might require too much power for my planned mobile application.
As things turned out this system is much better than I expected, for a number of reasons, but if I made a short list, number one would be its setup utility (which I will inaccurately call a BIOS). Intel calls it "Visual BIOS". Unlike most computers, this BIOS allows all sorts of settings and optimizations — you can choose a high-power mode, or a mode meant to preserve battery power. You can turn off processor cores to save power. You can choose which peripherals are enabled.
A concise overview of this NUC would be "A lot of computer in a small package."
This section describes the Intel NUC8I7HVK in detail and offers some advice and precautions. What's presented here will likely apply to other similar models in the Intel NUC lineup.
Disassembly
To add or remove components, and/or to deal with a possible BIOS issue to be described later, we need to disassemble the unit. Do this carefully, paying attention to anti-static issues and precautions, and using the right tools for the job.
Power down the unit and remove all cables.
Remove six Allen-head screws marked in red here:

Figure 6 (click image for full-size)
Remove connector circled in red and Phillips-head screw circled in yellow:
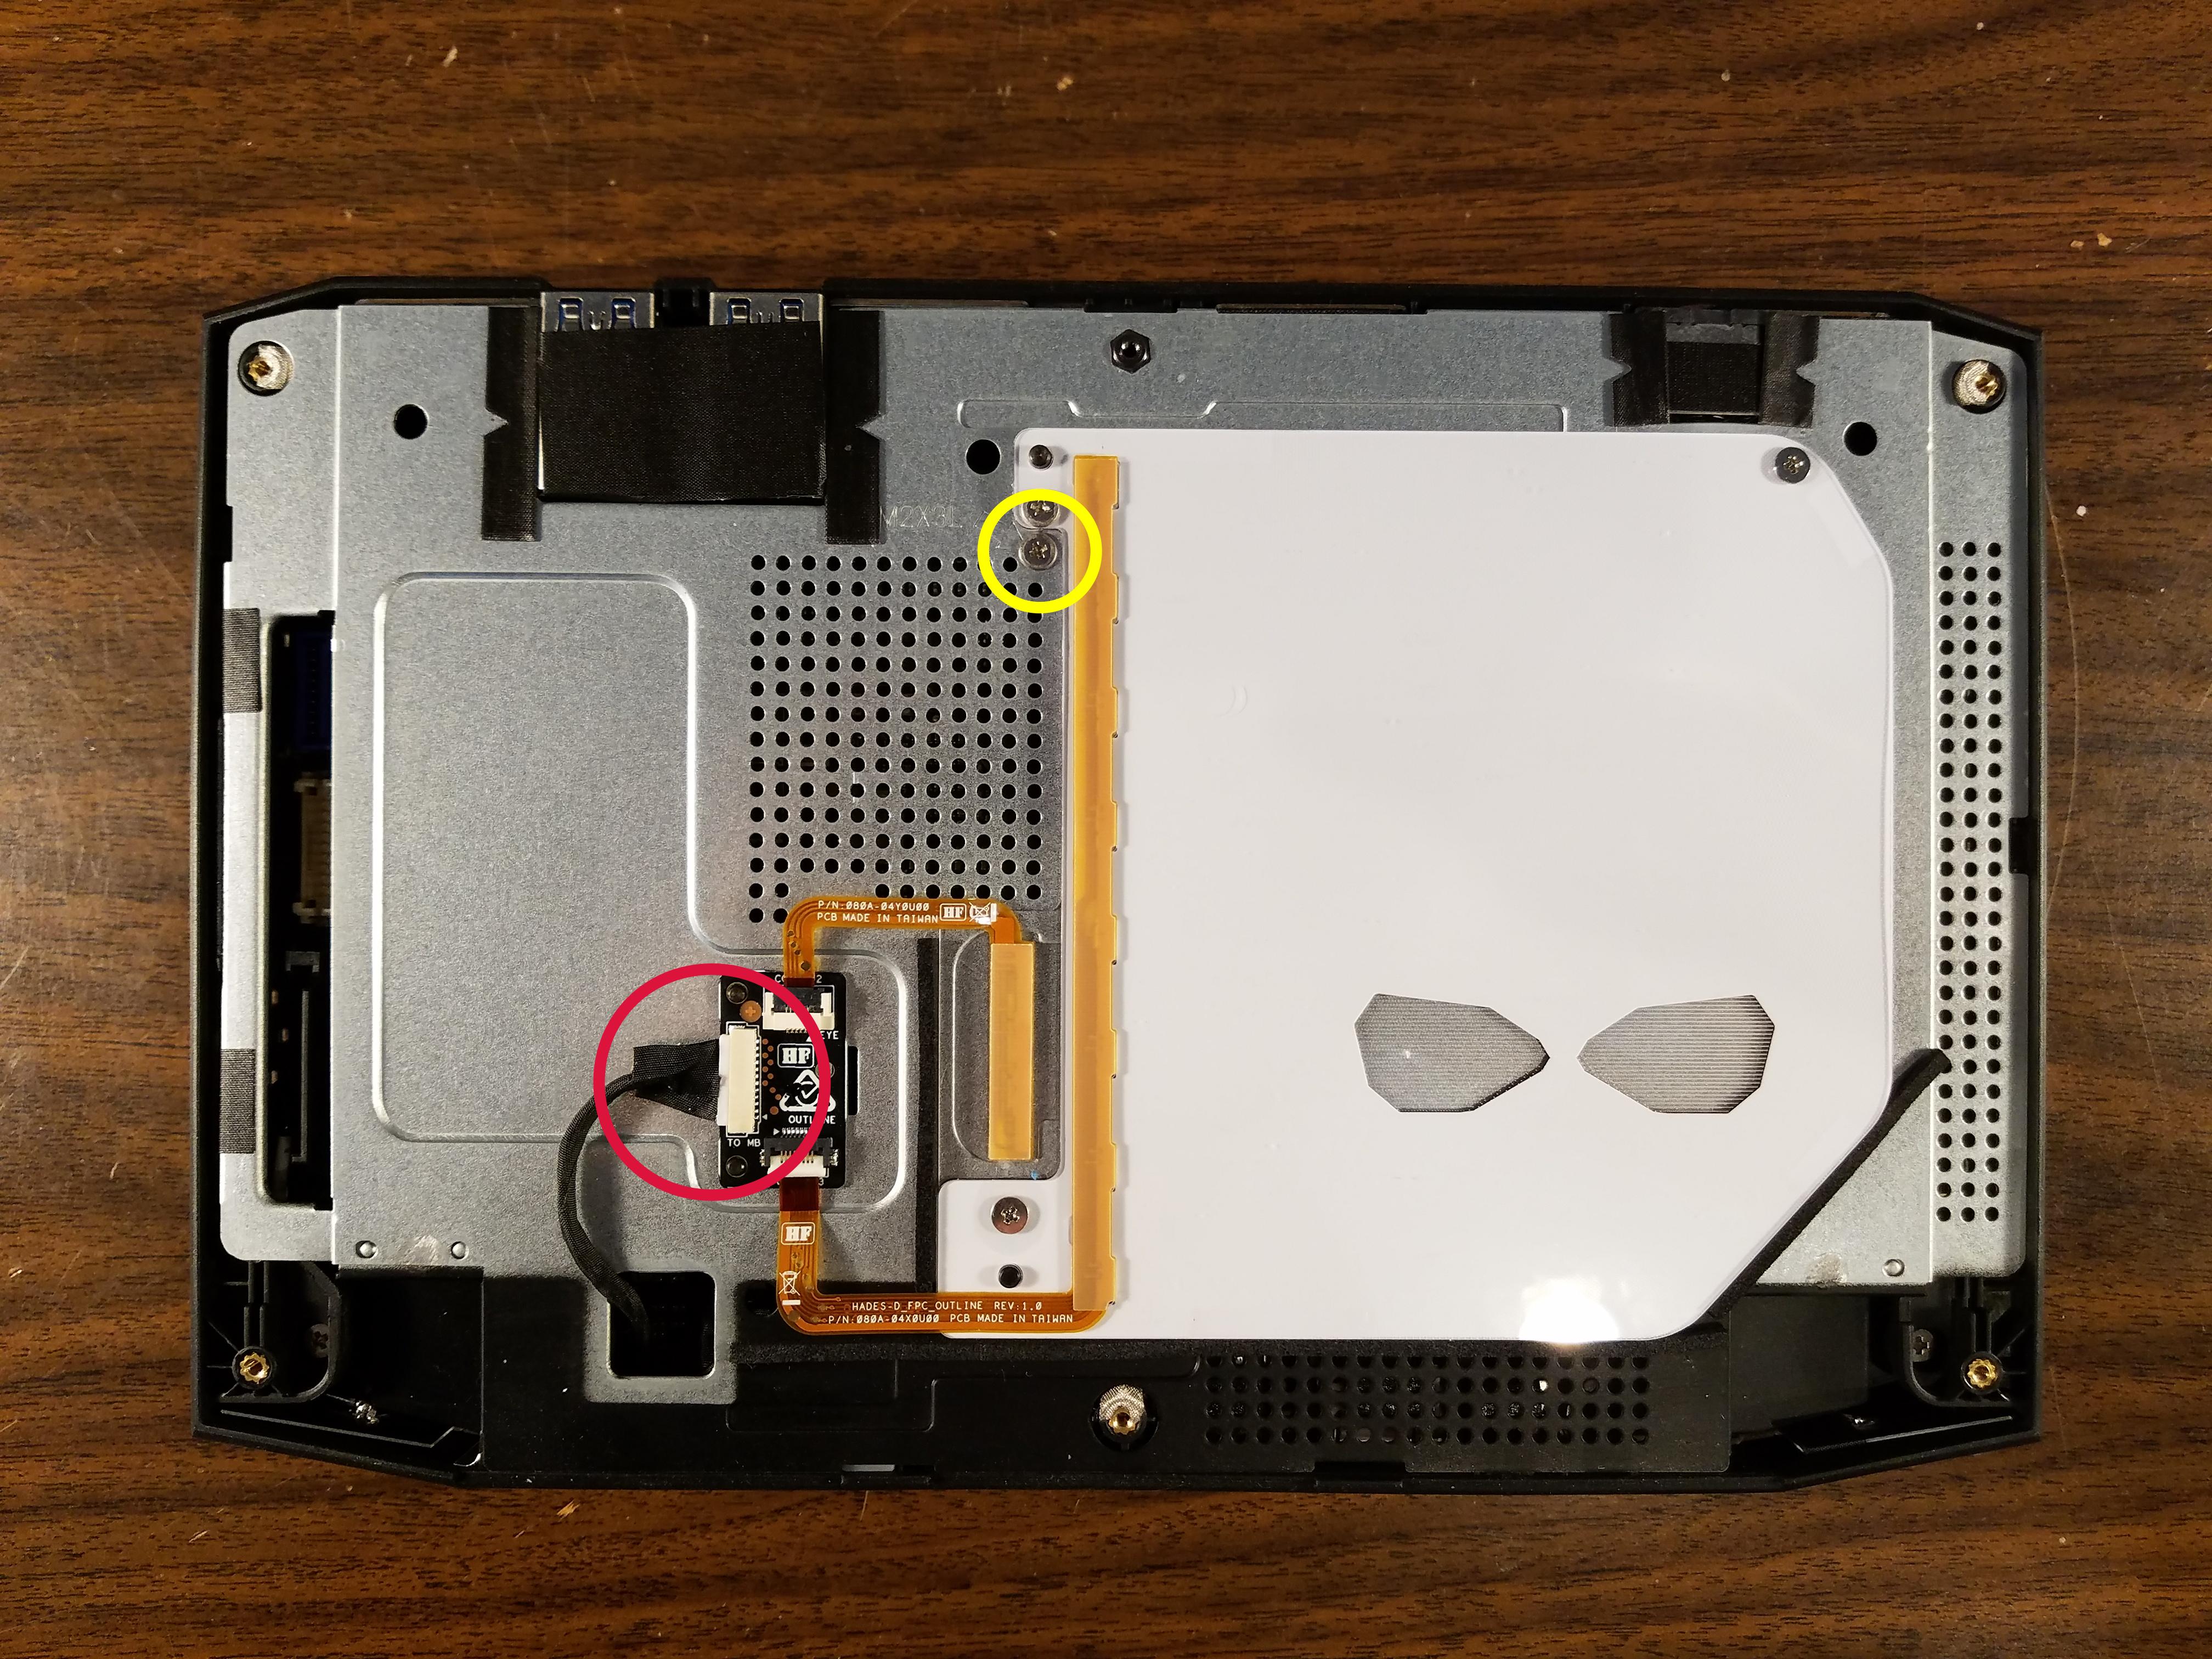
Figure 7 (click image for full-size)
For discussion below, note location of two mounting standoffs circled in red and BIOS jumper circled in yellow:
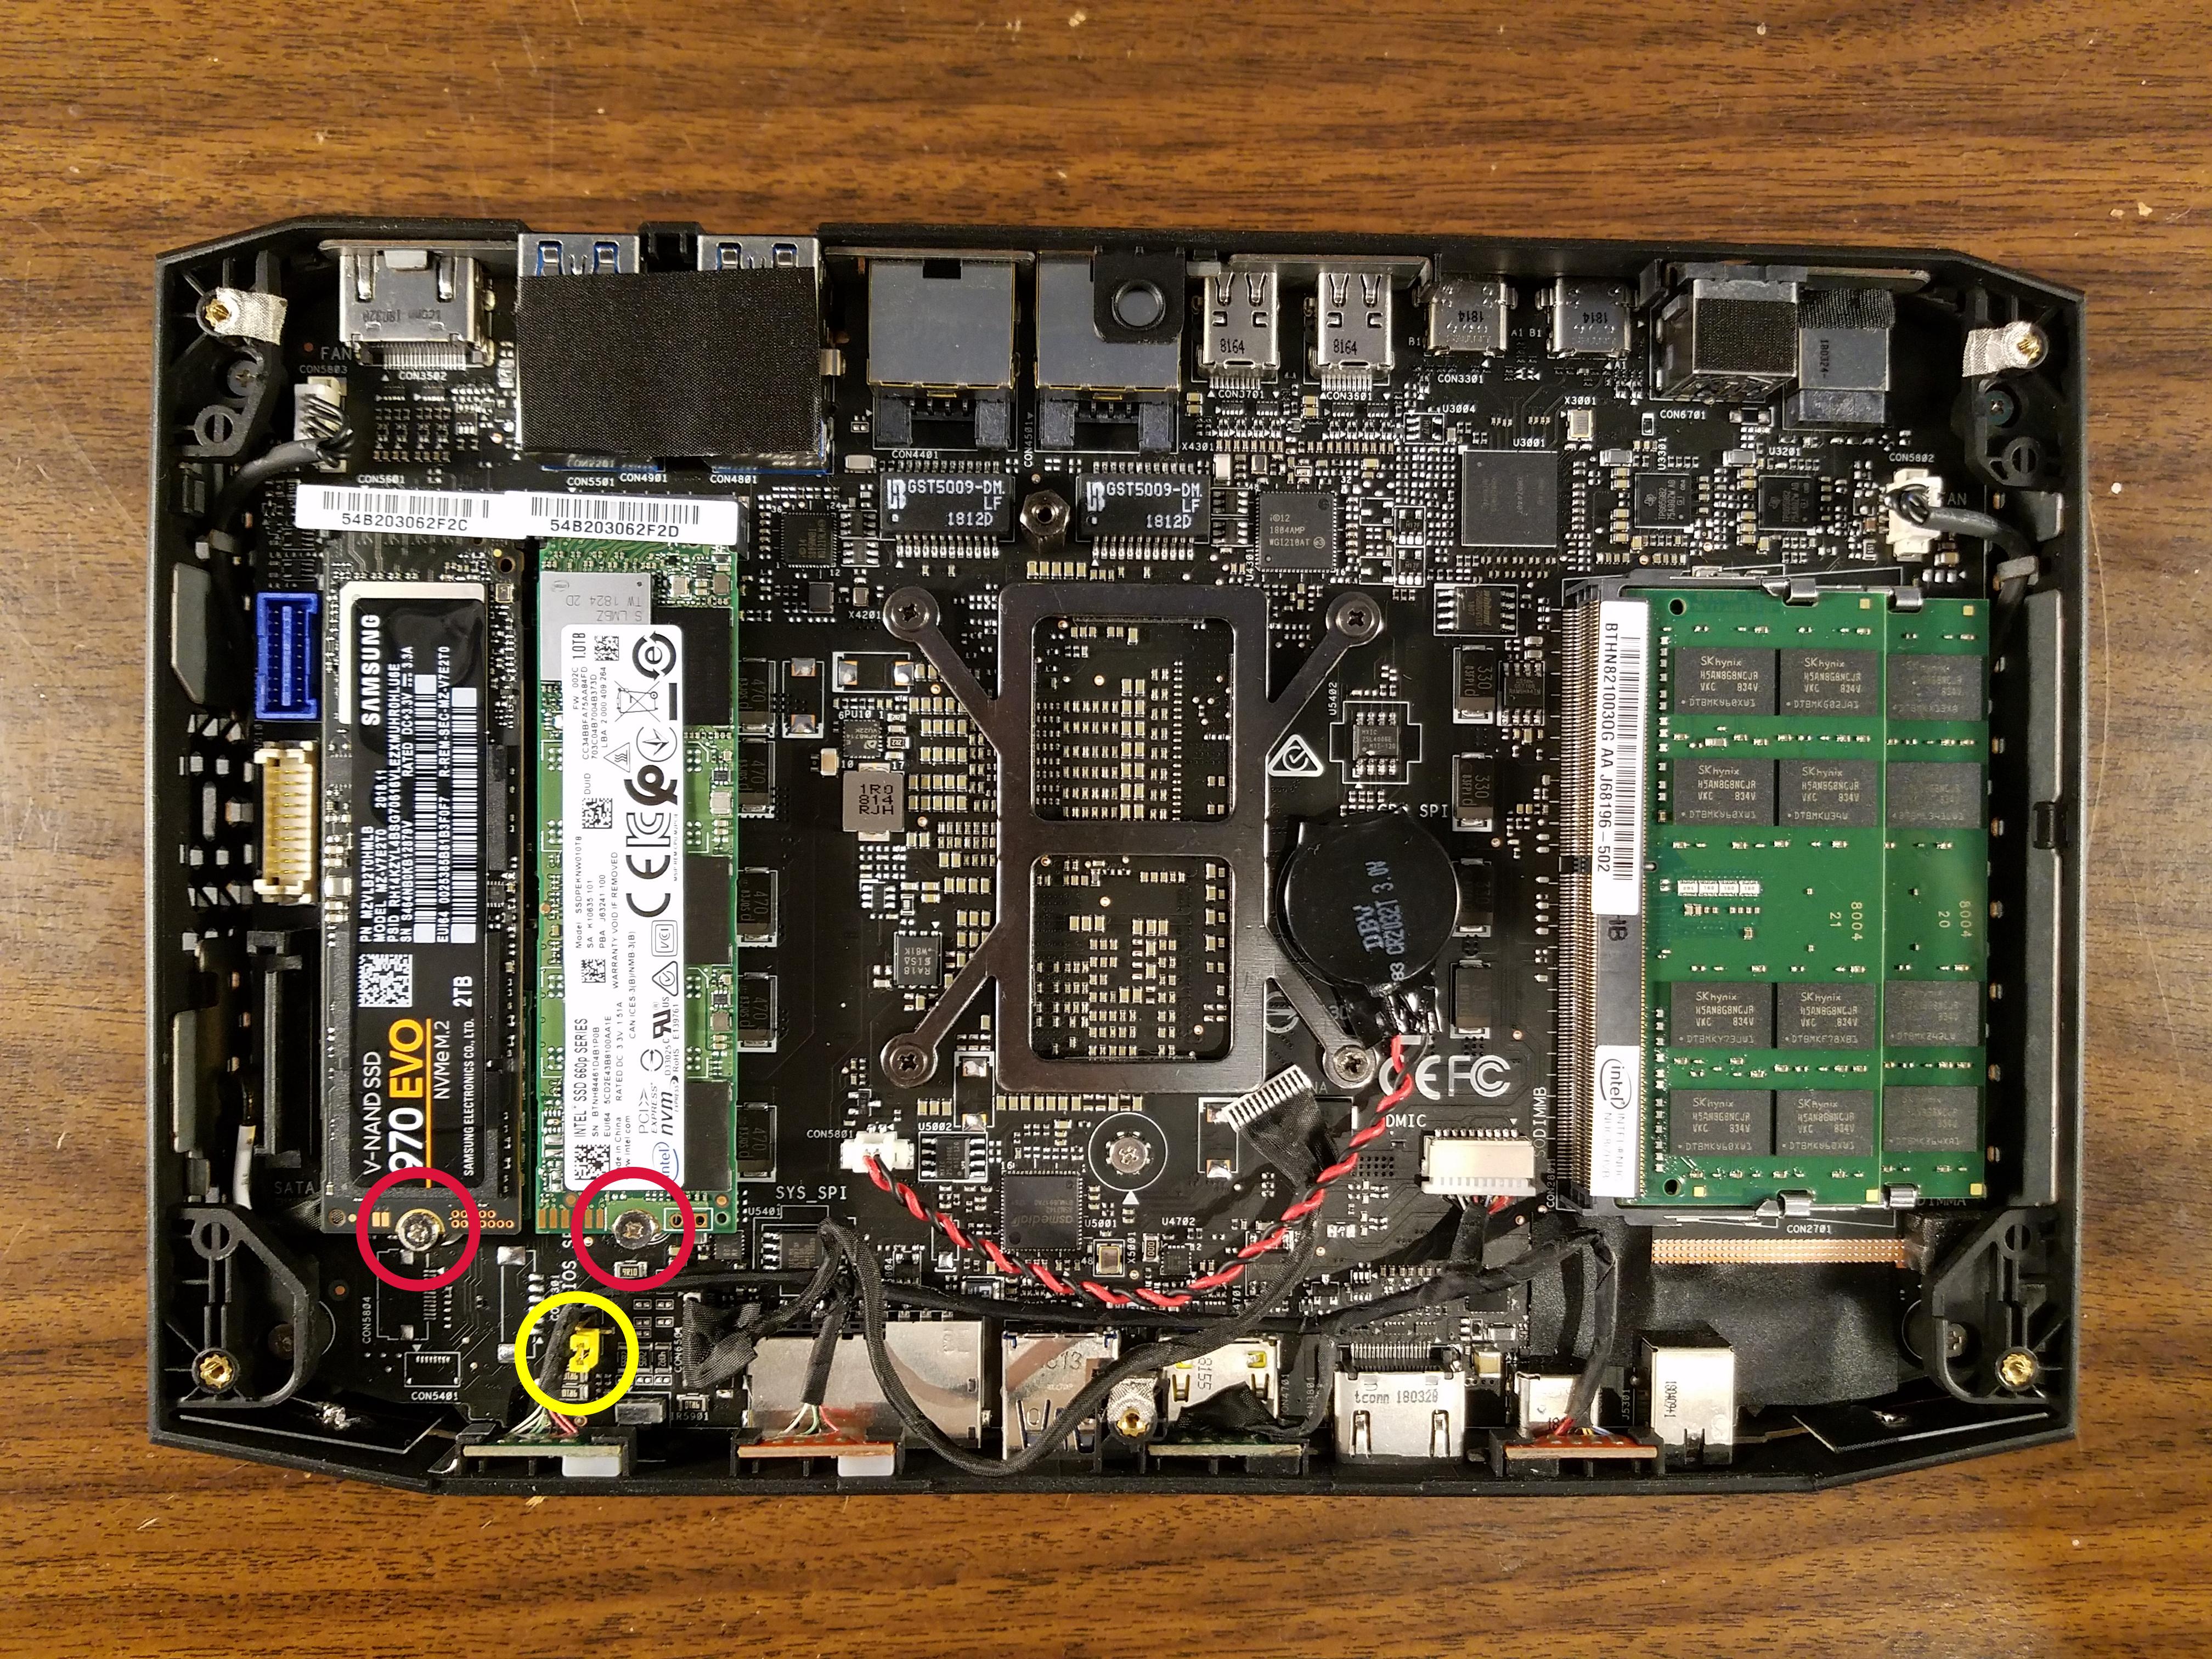
Figure 8 (click image for full-size)
Hardware Binding Precaution
In Figure 8 above, one can see two SSD mounting standoffs fastened by Phillips screws (red circles). The standoffs (not visible, below the SSDs) are aluminum and the screws are steel or brass. Be very careful removing these screws, and if there is significant resistance, use a long-nose plier to prevent the standoff from turning while loosening the screw.
The reason for this precaution:
- Dissimilar metals can bind if too much force is applied. This is particularly true if one of the metals is aluminum.
- Factory workers may overtighten the screws, knowing that if the screw should free itself during shipping or later, it would almost certainly cause a system failure while rolling around inside this unit.
- One of my NUC8I7HVK units had a bound screw for the reasons given above, which I turned until the standoff separated from the circuit board, screw still tight. That's an experience I would not want to repeat.
If you buy this unit at the lowest price, unlike Figure 8 there will be no SSDs installed (red circles). In a more typical purchase, one of the SSD positions will be occupied as delivered and the customer may choose to install an additional device in the unoccupied position. While removing the Phillips screws, apply only gentle force, and if the screw fails to yield, clamp the standoff with pliers before trying to apply more force.
BIOS Setting Precaution
Here's one of the "Visual BIOS" displays from the NUC8I7HVK:

Figure 9: Visual BIOS Boot Options (click for full-size)
In Figure 9, notice the "Fast Boot" option at left center (click the image to get a closer look). Hey, fast boot — that sounds like a cool thing, right? But don't enable this option! The reason? Fast Boot doesn't respond to the setup hot-key (F2), after which the most reliable way to recover is to:
- Disassemble the unit using Figures 6-8.
- Remove the yellow BIOS jumper that's circled in yellow in Figure 8.
- Reboot the system, enter BIOS, de-select "Fast Boot".
- Power down.
- Replace the BIOS jumper in its original position (and as shown in Figure 8) and reassemble the unit.
I personally would have included a dialog in the BIOS code that, on sensing that the fast boot option has been enabled, would ask, "Are you sure you want to do this?"
Here's an alternate recovery method:
- Power down the system.
- Press and hold the power button for three seconds (timing critical).
- Release the power button.
- The system should pause, then power up and show a special menu that allows entry into BIOS even though fast boot has been enabled.
This alternate method is a bit tricky to get right, so overall I recommend that people simply not enable fast boot.
Maximum Flexibility
Many of the NUC line of small computers can be gotten "bare-bones," without RAM or SSDs, which allows the user to populate the device according to his needs, while seeking the best price for parts. This is one of the many advantages of this product line — its configuration can be in the hands of the purchaser.
This doesn't mean users must populate their NUCs — many vendors offer preconfigured units. But for the buyer who wants to perform custom configurations, the basic nothing-installed model is the best choice.
As explained above I travel a lot, by boat and RV, and I need a computer that can be run on a 12 volt source and that requires little space or power. After lengthy evaluation and tuning, I now have this typical setup:
An Intel NUC8I7HVK equipped with two large internal SSDs (as shown in Figure 8):
- One 1 TB SSD for operating systems.
- One 2 TB SSD for data.
Apart from access speed, another advantage to SSDs as opposed to mechanical drives is much lower power use, exactly what I need for this mobile application.
A Logitech wireless keyboard-mouse combo, typically less than US$25.00.
(NOTE: Unlike a bluetooth keyboard, this keyboard-mouse combo can be used on a NUC system for BIOS configuration as well as normal operation.)A Wimaxit 13.3" 1920x1080 LCD display, very light weight, HDMI input, super low power requirement, can be powered by a USB connection. And as small as practical: 12 1/2" x 8" x 1/2" (318mm x 203mm x 13mm).
A 12v to 19v converter, 90 watts.
The elements of the described system occupy a small space, ideal for travel and cramped quarters.
For the NUC8I7HVK to work on the listed mobile power supply with minimal power drain, it should be configured to minimize power usage — first by selecting "Low Power Enabled":

Figure 10: Intel NUC8I7HVK Power Options (click for full-size)
Then by Setting the "Max Battery" option on the "Performance" tab:

Figure 11: Intel NUC8I7HVK Performance Options (click for full-size)
Those are the obvious settings. There are many more settings having to do with power usage, for example by shutting down one or more cores entirely. The best way to set this up is to acquire a power meter and experiment with the available options.
One of the many remarkable things about this device is that I can tune it to behave itself when powered by battery, then when I'm at home and want more processing power, I can change a few settings to get desktop machine performance (using the Intel-provided 19.5v 12 ampere supply).
Note on BIOS screen captures
This Intel NUC supports screen captures from within the BIOS, but the feature has a special requirement — at least one drive partition must be formatted with a Windows NTFS or FAT32 filesystem. If you have a Windows install, that will meet the requirement. If you don't have Windows installed but you need to capture BIOS screen images, create a small drive partition formatted with NTFS or FAT32, then reboot. The screen capture routine lists all partitions, and any NTFS/FAT32 partitions will be visible/accessible.
On these systems I primarily run Ubuntu in a dual-boot configuration with Windows 10 (I would dump Windows 10 but I sometimes get user inquiries about making my programs run under Windows). So my typical configuration is a 1 TB SSD that hosts Linux and Windows operating systems, and a 2 TB SSD for data storage.
Graphics Driver
At the time of writing (Spring 2019), the only significant Linux installation/configuration issue has to do with the graphics driver. The Intel NUC8I7HVK has an AMD Radeon RX Vega M GH, which can only be fully supported with an AMD driver, and that driver is only supported on Linux kernels 4.18 or newer. So one must install a kernel >= 4.18, then install the AMD driver:
Kernel Installation
- Go to https://kernel.ubuntu.com/~kernel-ppa/mainline/v4.18/ or a newer kernel source.
- Download packages suitable for your processor and requirements.
- In the directory where the downloads have been located, enter:
$ sudo dpkg -i linux-*.deb- Reboot before going on.
AMD Driver Installation
- Go to https://www.amd.com/en/support
- Select the correct download for your Intel NUC.
- Unpack the download and move into the resulting directory.
- Enter:
$ sudo ./amdgpu-installReboot Issue
This NUC model will not reliably reboot from Linux to Linux (Ubuntu 18.04). I know how odd that sounds, so let me explain:
- If rebooting from Windows to Windows, no problem.
- If rebooting from Windows to Linux, no problem.
- If rebooting from Linux to Windows, no problem.
- First time rebooting from Linux to Linux, no problem.
- Subsequent reboots from Linux to Linux, system hangs and must be powered off.
- Detail: the hang occurs at the transition between BIOS and Grub — the Grub menu never appears.
This is not a specific system failure — I have three of the same NUC model and all three show this symptom.
HDMI Sound
On Ubuntu 18.04, HDMI sound won't work with the Intel NUC8I7HVK model, and most likely others with the same audio chip set, until some tuning is performed:
- First:
- Edit /etc/pulse/default.pa
- Look for this line: "load-module module-udev-detect"
- Add "tsched=0" to the end of that line.
- Second:
- Edit /etc/modprobe.d/alsa-base.conf.
- Add to the end of the file: "options snd-hda-intel vid=8086 pid=8ca0 snoop=0"
- Third:
- Edit /etc/pulse/daemon.conf
- Find and replace:
- "default-sample-rate = .*" -> 48000
- "alternate-sample-rate = .*" -> 96000
- "avoid-resampling = .*" -> true
- "resample-method = .*" -> src-sinc-best-quality
This script will perform the above edits — but be careful: it's only been tested on Ubuntu 18.04, and it must be run as root. You may want to test it using copies of your configuration files before committing to its actions.
Notwithstanding the problems listed above, I like these little systems. They separate processing from peripherals more effectively than desktop or laptop machines, they're easily tuned to meet varying requirements, and unlike most computers they can be configured to use very little power when that's an issue.
I hope this article helps people set up this specific NUC model and similar ones, in particular for Linux service.
| Home | | Linux | | | Share This Page |
