The Process of Image Creation
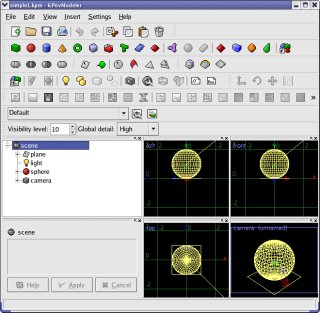
Step 1 (optional, desirable): Modeler
|
plane {
   <0, 1, 0>, 0
   pigment {
      checker
      color rgb <1, 1, 1>
      color rgb <0.666667, 0.8, 1>
   }
}
light_source {
   <-2, 5, -4>, rgb <1, 1, 1>
}
sphere {
   <0, 0, 0>, 1
   pigment {
      color rgb <1, 0, 0>
   }
   translate y*1
}
... and so forth
|
Step 2 (created by modeler or typed by user):
POV-Ray image description file
|
  0:00:00 Rendering line 1 of 240
  0:00:00 Done Tracing
Render Statistics
Image Resolution 320 x 240
----------------------------------------------------------------------------
Pixels:            76800   Samples:           76800   Smpls/Pxl: 1.00
Rays:              76800   Saved:                 0   Max Level: 1/5
----------------------------------------------------------------------------
Ray->Shape Intersection          Tests       Succeeded  Percentage
----------------------------------------------------------------------------
Plane                           148798           74560     50.11
Sphere                          148798           18172     12.21
----------------------------------------------------------------------------
Calls to Noise:                   0   Calls to DNoise:              10
----------------------------------------------------------------------------
Shadow Ray Tests:            143996   Succeeded:                  6501
----------------------------------------------------------------------------
Smallest Alloc:                   9 bytes
Largest  Alloc:              307208 bytes
Peak memory used:            464431 bytes
|
Step 3: POV-Ray image generation
|
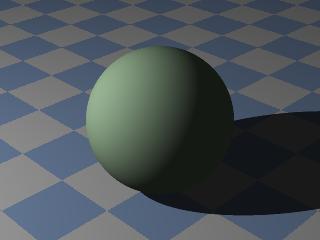
Step 4: Graphic image
|
At this point, you should have acquired POV-Ray and KPovModeler (or another POV-Ray modeling program), and perhaps you have run one or both of them and acquired some familiarity with them.
This page will show how to create your first image. It covers the steps from producing the plain-text POV-Ray scene description file to rendering an image. In the future, you may prefer to let your modeling program create the POV-Ray scene description file, and you may not look at this file very often, but it's important to know the contents of this file, and also to understand how the entire scheme works.
A digression. The key to POV-Ray's popularity, and the reason anyone can create a modeling program to talk to POV-Ray, is because POV-Ray's designers chose a plain-text, human-readable scene description format. Some of my readers may wonder if this actually represents the apex of computer sophistication — isn't an advanced document format supposed to be incomprehensible? Does't that prove how advanced the software is? Isn't that why Microsoft's documents are unreadable by anything but the program that created them?
In a word, no. Part of the computer revolution I spoke of earlier is a rebellion against non-portable, proprietary documents that require a particular computer program from a particular vendor to make them useful. People are realizing this means they are hostages to one software company, and they are freeing themselves. End of digression.
At the right is a basic flow diagram of the ray tracing system we are discussing. The reader needs to realize that, because of the relatively slow rendering times for ray tracing, the process of user interaction must be handled carefully. Over time one learns how to use the absolute smallest practical image to preview the results of changes, with the fewest advanced rendering features enabled. Only after the preliminary images show promise should one try to render an image at high resolution, using rendering features that require lots of processing time.
It seems inevitable that some POV-Ray features will not be supported by a particular modeling program, which means the user may have to hand-edit the scene description file before submitting it to POV-Ray, or the modeling program may offer the option of including raw text entries into the developing scene description. In both these scenarios, the user will need to learn the syntax of a POV-Ray scene description. Some of the more basic aspects of this syntax are presented in these pages, but for a full understanding of the syntax, the readers is referred to the full POV-Ray documentation set.
A copy of much of this documentation is installed along with the POV-Ray renderer during installation, so you may want to examine your own system's documentation first. In a typical Linux installation, the supplied documentation is located at (installation directory)/doc/html.
|


 Share This Page