

 Share This Page
| Home | | Android | | | | Share This Page |
Copyright © 2014, Paul Lutus — Message Page
(double-click any word to see its definition)
Click here to download this article in PDF form
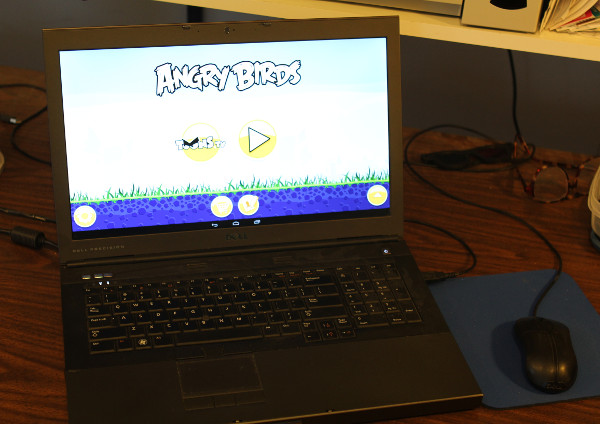
I have recently been developing software for the Android platform and have become pretty enthusiastic about its possibilities. I recently became aware of a project named Android-x86 that lets Android run on an x86 platform like a laptop or a desktop running an x86 processor. Some may wonder why someone would want to do this to a perfectly good tablet OS, but to a developer, the reasons are more obvious — you can test software more easily and quickly than with a small Android device, you can set up dual-boot configurations to make Android accessible on machines with lots of resources, you can test different display and peripheral configurations more easily than on a small Android device.
But after downloading several versions of the Android-x86 runtimes, I saw a problem — the default kernel was missing drivers required to support the hardware needed to run on a desktop machine. So I decided to download the source, configure the kernel and compile locally for my requirements.
It's been years since I needed to recompile the Linux kernel on a regular basis. Because of the much wider adoption of Linux since I started using it, and because of a more complete set of runtime modules, most things I added by hand in the old days are now included by default in stock kernels. But Android is a special case — its Linux kernel is designed to be as small as practical to work on a small platform, using the smallest practical amount of memory and CPU clock cycles. So moving Android to a laptop or desktop environment represents a philosophical as well as practical departure.This howto explains how to get the Android-x86 source, modify it, compile it, and install it on a laptop or desktop machine.
The developers behind Android-x86 have expended a lot of time and energy configuring their environment to be suitable for laptops and other small x86 environments, and their default packages will run on many laptops, but — for lack of much SATA drive support — it's compatible with fewer modern desktop machines. My primary reason for this project was to make the kernel more accommodating of different system requirements.
When I realized I was going to have to configure and compile a special version of the Android-x86 kernel, I naturally enough looked around for guidance and found this guide — an astonishingly uninformative source of information. After struggling to decode this guide, I decided to start over and craft my own methods — and my own description.
First, even though Android includes a Linux kernel, compiling Android isn't very much like compiling a Linux kernel by itself. Notwithstanding that the point of this project is to modify just the kernel, it's necessary to have the entire Android source present for the compilation. The following list of steps assumes a Ubuntu/Kubuntu Linux working environment, but it should be reasonably portable across Linux distributions. This plan also tries for the least amount of effort and complexity — it modifies and compiles a new Android kernel, then drops this replacement into the directory tree of a stock Android-x86 installation.
Okay, let's get started.
Your system will need some libraries for development work. The command below should provide most of them, or tell you that you already have them:
# apt-get install gcc python-lunch libqt4-core libqt4-gui qt4-default gcc-multilib distcc ccacheThe above can only guess at what resources your system doesn't have, or that my system has that I don't realize. In most cases your system will tell you what it lacks.
Acquire the Android-x86 source using these instructions:
$ mkdir android-x86
$ cd android-x86
$ repo init -u http://git.android-x86.org/manifest -b kitkat-x86
$ repo sync
The green text above is a matter of choice. Visit the source page to see the options, and as time passes, this specification is likely to change.
Warning: At the time of writing, the above download is over 14 gigabytes in size. Therefore I recommend making a backup copy, because any number of errors in what follows could corrupt the directory tree in a way that might require it to be replaced.
For the remainder of these instructions, let's assume the existence of a work directory we'll arbitrarily call "work", under which the above-created android-x86 source directory is placed. Like this:
/work└ /android-x86Now create a directory that will contain our custom configuration. Locate it this way:
/work├ /android-x86└ /configNow locate the default kernel configuration and move a copy into our custom configuration directory:
Make a copy of this file: /work/android-x86/kernel/arch/x86/configs/android-x86_defconfig
Change the copy's name to ".config" and put it here: /work/config/.config
The configuration file should appear in the tree as shown here:
/work├ /android-x86└ /config└ .configNow to configure the kernel. Open a shell in the android-x86 directory and execute the instructions below (or create a shell script to execute them):
$ . build/envsetup.sh
$ export ARCH=x86
$ lunch android_x86-eng
$ make -C kernel O=/work/config/.config xconfig
Assuming no missing libraries or typographical errors, the above should launch an easy-to-use GUI kernel option selection dialog that looks like this:
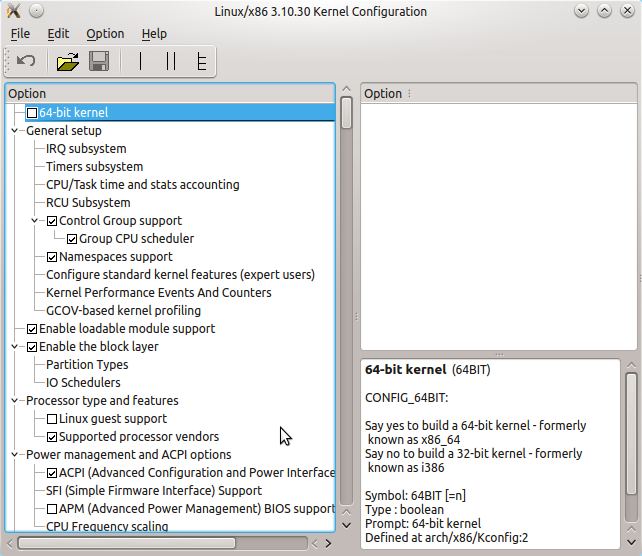
Make any option changes you require, remembering that many of the pre-existing settings resulted from a great deal of thought and work (meaning don't change things you don't understand). In my case, to make desktop operation possible, I needed to add SATA drive support, and the drivers needed to be statically linked.
Save your changes and exit the dialog. This action will place the changes in the file we created above — with the advantage that it is located outside the source tree, so if we must replace or refresh the source, our configuration changes will be preserved.
Now we move to compilation. Before we actually perform a compilation run, I want to strongly recommend the use of distcc, a utility that distributes compilation tasks across multiple machines to improve speed. If you decide to run distcc:
- Install distcc on each machine on your local network:
# apt-get install distcc ccache- For each distcc installation, edit its configuration (/etc/default/distcc) to include these options:
STARTDISTCC="true" # meaning at boot
ALLOWEDNETS="192.168.0.0/16" # set to your local network
LISTENER="0.0.0.0" # meaning listen to any source
NICE="4" # i.e. not very nice
JOBS="4" # usually set to the number of processors on the machine
ZEROCONF="true" # very important: means no distcc host file needs to be maintained
Now for a compilation run. Move into the android-x86 source directory and issue these commands (or write a shell script to run them):
export ARCH=x86
export TARGET_PRODUCT=android_x86
export TARGET_KERNEL_CONFIG=/work/config/.config
export CC="distcc gcc" # only if using distcc
export CXX="distcc g++" # only if using distcc
make clean # optional, first time
# either:
make kernel -j16 # if using distcc, "-j(n)" n = cores x hosts
# or:
make kernel -j4 # if not using distcc, very slow
This should start the compilation. I should warn you that people in the Android-x86 discussion forum report compilations that take days, because they have just one computer, and one that's not meant for development work. This is why I recommend distcc on every machine you can get your hands on and network up.
On subsequent compiles, for example to test the effect of different option selections, it may not be necessary to "make clean" as shown above, a step that forces a complete recompilation. In most cases skipping this step will produce a much quicker result.
The result of a successful compilation will be this file: /work/source/out/target/product/x86/kernel , used in our next step.
If something goes wrong, and in particular if you think you need to start with the original source tree, you can save a lot of time by using rsync to synchronize the work source with a backup copy of the original, unmodified source (the one you wisely backed up earlier). Resynchronize your working copy with the backup like this:
$ rsync -a --delete /backup-source-location /work/android-x86- The above synchronization method is much faster than syncing to source online, and it's one of several reasons to have a full backup. It also shows why it's important to locate the custom configuration outside the source tree.
There's a simple way to test a new kernel — just drop it into an existing installation of Android-x86. In fact, because of the driver issue this project addresses, I wasn't able to install Android-x86 on any of my desktop machines (the install version of Android-x86 couldn't detect the drives either). So instead I installed onto a USB stick, then copied the resulting installation onto a new partition on one of the desktop machines I wanted to test. By "result" I mean the entire installation — I copied the entire "android-4.4-RC1" directory (the version current at the time of writing) onto the target partition.
To avoid confusion, let's list the steps:
- Download an Android-x86 installation ISO from this page.
- Using your platform's tools, burn the installation ISO onto a USB stick or a CD.
- Boot the installation media and see if it can detect your desired installation target, and be careful — don't assume the installation program will detect only empty partitions and spare storage devices.
- If the installation program successfully detects your install target, proceed with the installation.
- If (as in my case) it's necessary to install to a substitute medium like a USB stick, in preparation for installation on an unrecognized device:
- Boot the machine in the usual way, in which all the devices can be detected.
- Copy the successful installation onto an empty, formatted target.
If the desired target is a hard drive partition on a laptop or desktop machine:
It's possible and sometimes desirable to shrink an existing partition and create a new, smaller partition to accommodate Android-x86:
- The easiest way to change partitions, or create new partitions, on an existing drive, is to run Gparted from a bootable CD or USB stick (because the drive being operated on must be unmounted).
- I usually have a few copies of a great small Linux distribution called Knoppix installed on USB sticks, and Knoppix always has Gparted among its tools.
- I typically boot a Knoppix USB stick, which allows me to manipulate the partitions on a drive that is normally mounted and therefore inaccessible to modification.
- Remember that if you change a drive's boot partition in any significant way, you need to reinstall Grub on that drive. This can be a bit tricky because the current Knoppix version at the time of writing (7.2) has legacy Grub installed, but most modern Linux distributions have Grub 2 installed. To make matters worse, Grub 2 is called "grub", responds to the same commands, but produces different results.
- Given that, and not wishing to get into a difficult topic, for the present purpose I will recommend that you avoid changing the location of the boot partition while making room for Android-86.
Assuming you have created a suitable partition with filetype ext2 or ext3, simply copy an entire successful installation from (for example) a USB stick to the new partition.
Then, to test a new kernel, simply copy the result of the prior section's compilation into a working Android-x86 installation — copy the kernel from /work/source/out/target/product/x86/kernel to (target path)/Android-4.4-RC1/kernel — and reboot.
This is an extra topic, beyond the main purpose of compiling and testing a modified kernel, but it's very useful to be able to choose which OS to run when booting a machine.
Most modern Linux distributions have moved from legacy Grub to Grub 2. In legacy Grub, one could simply edit a file located at /boot/grub/menu.lst, add or move a menu entry, then reboot. Things are a bit more complex in Grub 2.
In Grub 2, the boot sequence and menu items are defined by files located under /etc/grub.d. To add one or more menu items, you:
- Write a special configuration file to be explained below,
- Put the file in the /etc/grub.d directory,
- Make the file executable ( chmod +x (path to file) ),
- Issue the command update-grub as root.
Here's an example of such a configuration script, suitable for dual/multi booting Android-x86 along with other operating systems:
#!/bin/sh

echo "$0: Android-4.4-RC1 (on /dev/sda4)" >&2
exec tail -n +4 $0

menuentry "Android android-4.4-RC1 Normal (on /dev/sda4)" {
        set root=(hd0,4)
        linux /android-4.4-RC1/kernel root=/dev/ram0 \
        androidboot.hardware=android_x86 acpi_sleep=s3_bios,s3_mode \
        SRC=/android-4.4-RC1 DPI=160 UVESA_MODE=1280x1024
        initrd /android-4.4-RC1/initrd.img
}

menuentry "Android android-4.4-RC1 Debug (on /dev/sda4)" {
        set root=(hd0,4)
        linux /android-4.4-RC1/kernel pnp.debug=1 root=/dev/ram0 \
        androidboot.hardware=android_x86 acpi_sleep=s3_bios,s3_mode \
        SRC=/android-4.4-RC1 DEBUG=1 DPI=160 UVESA_MODE=1280x1024
        initrd /android-4.4-RC1/initrd.img
}
Here are some notes about the script:
- The line "set root=(hd0,4)" identifies the Android-x86 partition.
- The first number (0) refers to /dev/sda. For /dev/sdb it would be 1 and so forth.
- The second number refers to the partition -- (4) refers to the fourth partition, so hd0,4 = /dev/sda4.
- If your drive or partition differ, change every appearance of "hd0,4" to meet your requirements.
The lines beginning with "linux" and "initrd" give the location of their respective files on the named device. If the directory name on the Android-x86 installation isn't "android-4.4-RC1", all appearances of this name need to be changed.
The DPI=160 entry provides a hint about the display's pixel density in dots per inch. This is an important setting -- if the Android display's icons and text look too small and crowded, increase this number. If things seem too big, make it smaller.
The UVESA_MODE=1280x1024 entry describes the display size. This is also an important setting. If you know your display's actual dimensions, enter them here. But not all dimensions work -- it sometimes happens that a display specification that's possible in principle isn't feasible in practice.
Once you've edited the above configuration to suit your environment:
- Create a file named "45_android" or another suitable name that doesn't conflict with any existing files and has a number higher than any others in the /etc/grub.d directory.
- Put the file in /etc/grub.d.
- Make the file executable: chmod +x (file path)
- Issue the command update-grub as root.
If no errors were generated, you can reboot and choose the Android-x86 entry from your new Grub boot menu, and run Android on your laptop or desktop.
| Home | | Android | | | | Share This Page |